
Upload document
You can upload business documents to an ontology, such as company reporting standards, standard operating procedures (SOPs), policies, metric definitions and process guides. Once a document is uploaded, you can link it to nodes and relationships so that the written business context sits alongside the data it describes.
When to use documents
Section titled “When to use documents”Data shows what happened, and documents explain how it is defined or governed. Typical examples include:
- Reporting standards: how a KPI is defined, calculated and reported.
- Standard operating procedures: the approved way of carrying out a process.
- Policies and guidelines: rules that apply to a business area.
- Glossaries and metric definitions: shared meanings for business terms.
For example, an On Time In Full (OTIF) SOP can be attached to a Shipment node so that anyone exploring that node can see how OTIF is measured.
Supported file types
Section titled “Supported file types”| File type | How it is handled |
|---|---|
| Converted to Markdown automatically using AI. You can edit the result afterwards. | |
| Markdown (.md) | Uploaded as is. |
Step 1: Open the Document Library
Section titled “Step 1: Open the Document Library”- Open your ontology on the canvas.
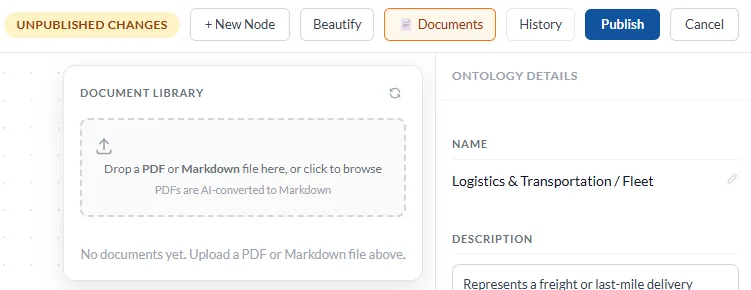
- Click Documents in the top toolbar.
The Document Library panel opens. If no documents have been added yet, it shows the message No documents yet. Upload a PDF or Markdown file above.
Step 2: Select a file
Section titled “Step 2: Select a file”In the upload area, either:
- Drag and drop a PDF or Markdown file onto it, or
- Click the area to browse and choose a file from your computer.
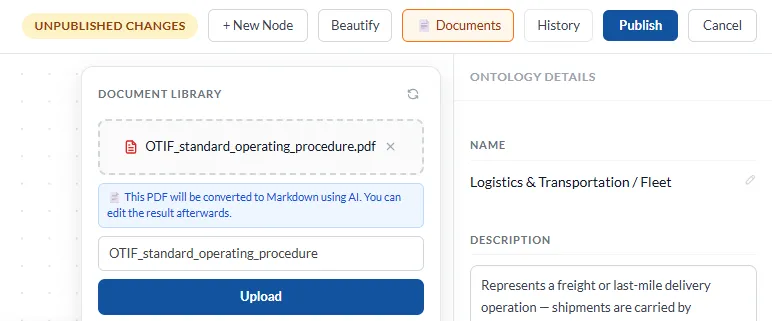
Once selected, the file name appears in the upload area. Click the × next to the file name if you picked the wrong file.
If you selected a PDF, a message confirms that the PDF will be converted to Markdown using AI and that you can edit the result afterwards.
Step 3: Name and upload the document
Section titled “Step 3: Name and upload the document”- Check the document name in the text field below the file. It is pre-filled from the file name, so change it to something clear and recognizable, for example OTIF Standard Operating Procedure.
- Click Upload.
Step 4: Wait for processing
Section titled “Step 4: Wait for processing”After you click Upload, the document appears in the library with a Processing status while it is being converted.
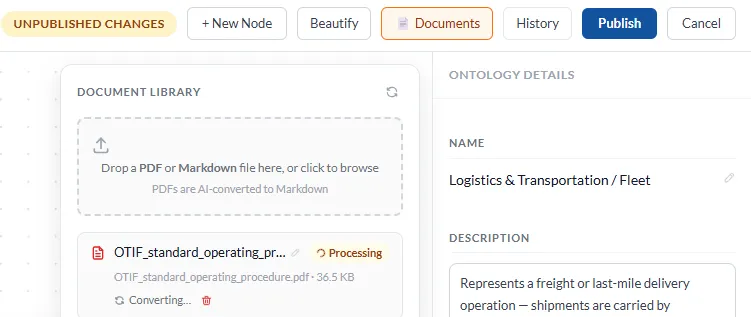
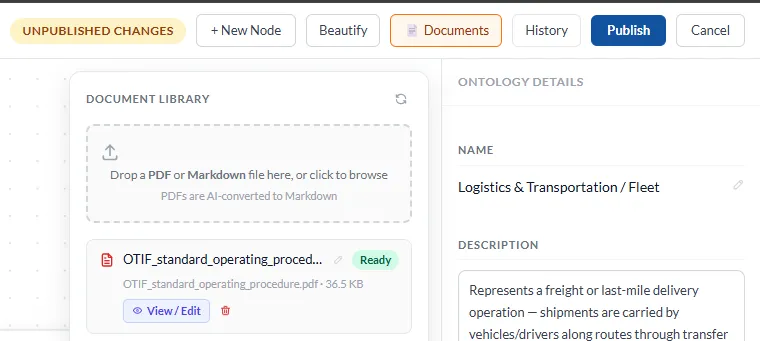
The library lists the document’s name, original file name and file size. When conversion finishes, the status changes to Ready. If the status has not updated, click the refresh icon at the top right of the Document Library.
Step 5: Review and edit the document
Section titled “Step 5: Review and edit the document”AI conversion of a PDF is a good starting point, but it is worth checking the result.
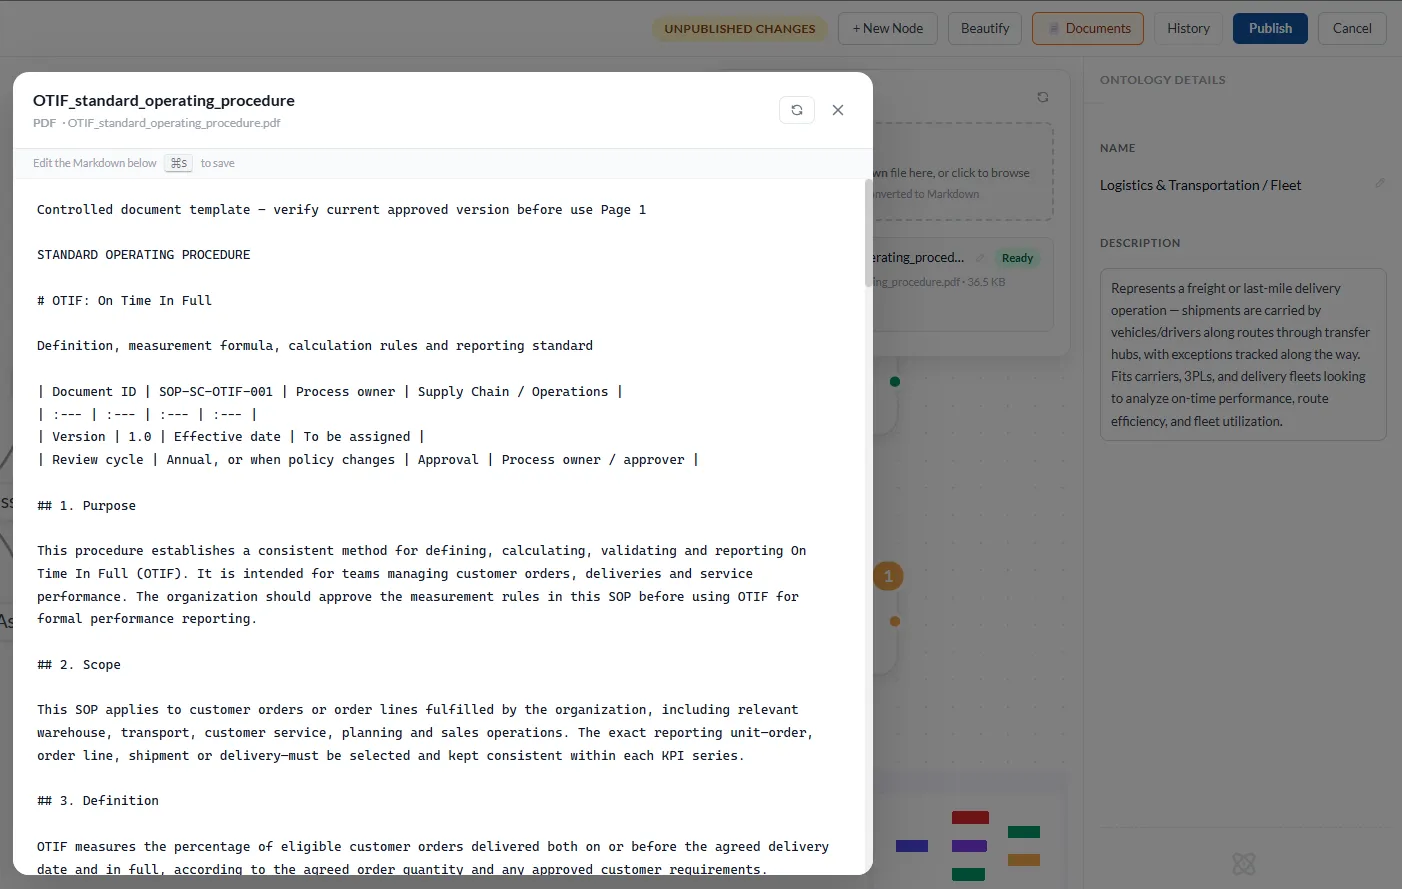
- In the Document Library, click View / Edit on the document.
- The document opens as Markdown. Headings, tables and sections from the original are converted into Markdown formatting.
- Edit the text directly. Fix any conversion errors and remove content you don’t want in the ontology, such as page headers or boilerplate.
- Save your changes. The editor shows the save shortcut (⌘S on Mac).
To remove a document, click the delete (bin) icon next to it in the Document Library.
Step 6: Link the document to nodes and relationships
Section titled “Step 6: Link the document to nodes and relationships”After the document is uploaded, you can link it from any node or relationship.
- Click a node or a relationship on the canvas to open its panel on the right-hand side.
- In the Links section, click Add link and choose the document.
- Alternatively, in the Description field, type
@and select the document to link it inline.
You can link a single document to several nodes and relationships, and attach more than one document to the same node.
For the full node and relationship workflow, see How to Create an Ontology.
- Use descriptive names. Names like OTIF Standard Operating Procedure are easier to find than file names like
SOP_v3_final.pdf. - Review PDF conversions. Tables and complex layouts may not convert perfectly.
- Keep documents focused. One document per standard or procedure makes linking more precise.
- Use the latest approved version. Check that the document is current before uploading it.
- Remember to publish. Document changes appear with the Unpublished changes indicator in the toolbar, so click Publish when you are done.